OK, so this is a quick 'how-to' guide to putting an Audi OEM reversing camera into a 2007 B7 A4 Saloon.
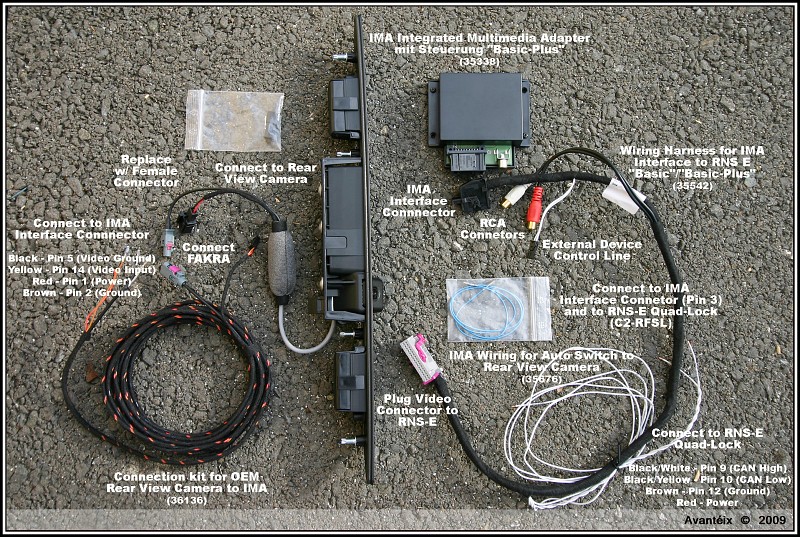
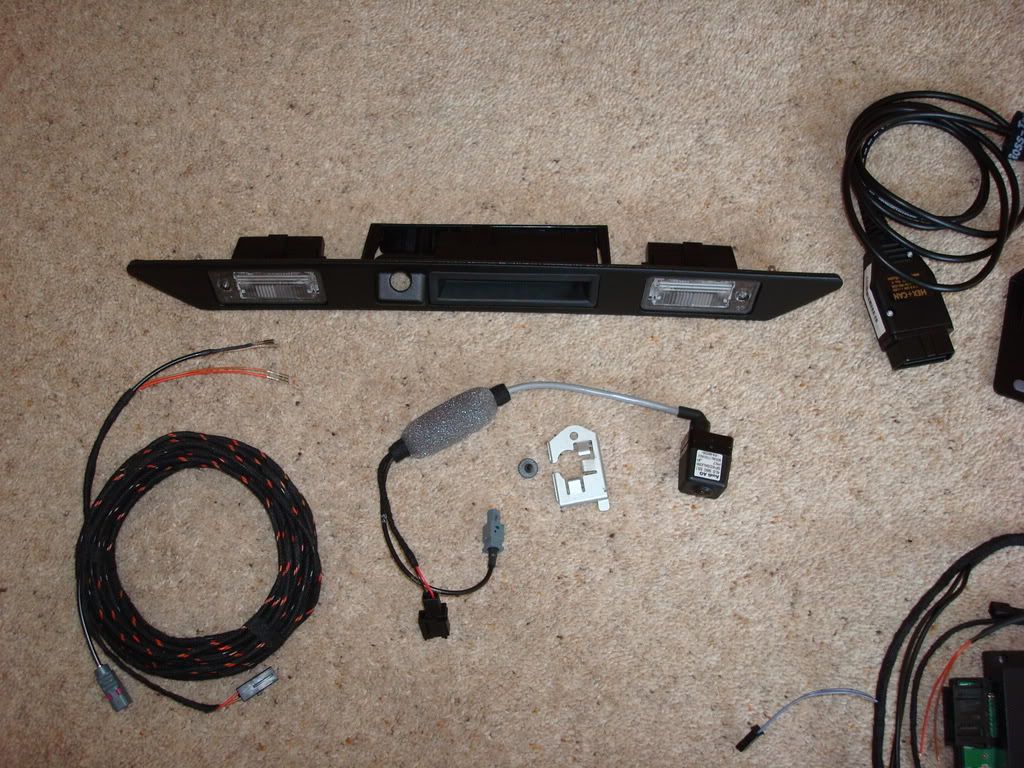
These are the parts that I used, from Kufatec.de and from Audi themselves.
Kufatech
35542 - Wiring harness for IMA Audi RNS E "Basic" / "Basic-Plus"
35676 - Wiring IMA auto switch Rear View Cam Audi RNS-E
35538 - IMA Integrated Multimedia Adapter mit Steuerung "Basic-Plus"
36136 - connection kit original rear view camera VAG to IMA
Audi
4L0 980 551 - Rear View Camera
4L0 827 574 3F2 - Door handle
4L0 980 553 - Camera retaining clip
N 909 159 01 - Tapping Screw
![Image]()
Here we can see the OEM camera and new number plate light assembly which will hold the camera in position.
![Image]()
Here we can see a close up of the camera installed within its new housing.
So the first job is to strip out the trims inside the boot and on the inside of the boot.
Remove the floor trim and spare wheel.
Remove the trim on the back of the rear seat - pop off the clips circled in red and it comes away easily.
![Image]()
Next, take out the trim covering the boot latch, remove the 2 10 mm nuts and it simply pops off in a upward direction.
![Image]()
Now take out the plastic clip circled in red and ease out the side trim, Its a bit tight but it will go in the end!
![Image]()
Now you need to remove the trim covering the inside of the boot, Firstly get rid of the warning triangle.
There is one screw inside the internal pull-down handle and then the 8 spring clips are simply popped off and the trim is off.
![Image]()
Next week need to remove the old number plate light assembly. 4 10mm nuts are accessed from inside and the multi-plug to the boot release handle are removed and it will simply withdraw from the boot. Like so:
![Image]()
As the B7 A4 never had a factory fitted OEM camera option, we are using kit from the A6+Q7. Therefore when the Q7 number plate light assembly is fitted there is no longer room for the original boot lock. I had never used it in the year I have owned the car so I wasnt concerned about losing it.
You need to release the plastic clip holding the boot release cable to the lock and then it simply turns within the number light assembly and comes out. It can be a bit stiff to turn so I put the key in to assist in turning it. And here it is once removed:
![Image]()
You also need to unplug the wire on the boot lock and secure it out the way - it wont be used again - it simply sends a signal telling the car what position the boot lock was in.
Next up we need to fit the new housing, some people have reported the need to cut out some of the metal from inside the boot to make this all fit! I can confirm that this IS NOT required. You simply need to fit the new housing without the camera fitted, this allows it to fit into the aperture in the boot. When then the new handle is in, secure it using the 4 10mm nuts - They dont need to be too tight! And then ensure the multiplug is connected to the boot release handle. I tested the operation of the boot release before I closed the boot.
Didnt want to find the boot would not open, thankfully all was well, the boot opens fine with either the remote button or the push-botton on the boot handle. Then fit the the camera into the housing and secure using the mounting plate and screw that are listed in the parts required section. You can't go wrong here because it will only fit into the housing one-way. So you cant put it in upside down!
Then we should be left with something like this:
![Image]()
I know from the picture it looks like there could be a gap a the top of the trim but its just the angle of the camera. The number plate light trim is an exact match from the one that was removed. No cutting, trimming or bodging to fit was required. Now connect the long extension wire from kufatec to the OEM camera, there is one 'FAKRA' type plug and another 2 pin plug for power/earth. These are plug and play, again no bodging required!
Next up is the fiddly bit. Feeding the Kufatec wire through the rubber grommet that connects the boot and the body. As we already have the innner side boot trim removed you should be able to see where the wires come through into the car. Feed the wires throug the boot, down into the bottom left hand corner where the boot is fitted.
![Image]()
I managed to feed a stiff piece of wire through the boot first and then using very strong tape I attahced the Kufatec wire to this and pulled it through. I used a few drops of washing up liquid to help ease the wire through the rubber as it can be quite a tight fit. Just take your time and pull the wire through SLOWLY to prevent it falling off or potentialy damaging anything if your were to slip or make a mistake.
These are the parts that I used, from Kufatec.de and from Audi themselves.
Kufatech
35542 - Wiring harness for IMA Audi RNS E "Basic" / "Basic-Plus"
35676 - Wiring IMA auto switch Rear View Cam Audi RNS-E
35538 - IMA Integrated Multimedia Adapter mit Steuerung "Basic-Plus"
36136 - connection kit original rear view camera VAG to IMA
Audi
4L0 980 551 - Rear View Camera
4L0 827 574 3F2 - Door handle
4L0 980 553 - Camera retaining clip
N 909 159 01 - Tapping Screw
Here we can see the OEM camera and new number plate light assembly which will hold the camera in position.
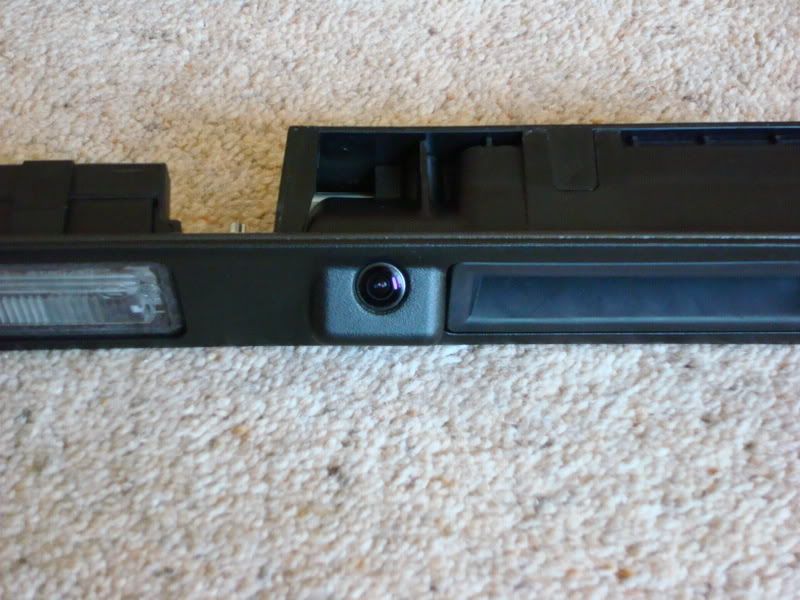
Here we can see a close up of the camera installed within its new housing.
So the first job is to strip out the trims inside the boot and on the inside of the boot.
Remove the floor trim and spare wheel.
Remove the trim on the back of the rear seat - pop off the clips circled in red and it comes away easily.

Next, take out the trim covering the boot latch, remove the 2 10 mm nuts and it simply pops off in a upward direction.

Now take out the plastic clip circled in red and ease out the side trim, Its a bit tight but it will go in the end!

Now you need to remove the trim covering the inside of the boot, Firstly get rid of the warning triangle.
There is one screw inside the internal pull-down handle and then the 8 spring clips are simply popped off and the trim is off.

Next week need to remove the old number plate light assembly. 4 10mm nuts are accessed from inside and the multi-plug to the boot release handle are removed and it will simply withdraw from the boot. Like so:

As the B7 A4 never had a factory fitted OEM camera option, we are using kit from the A6+Q7. Therefore when the Q7 number plate light assembly is fitted there is no longer room for the original boot lock. I had never used it in the year I have owned the car so I wasnt concerned about losing it.
You need to release the plastic clip holding the boot release cable to the lock and then it simply turns within the number light assembly and comes out. It can be a bit stiff to turn so I put the key in to assist in turning it. And here it is once removed:

You also need to unplug the wire on the boot lock and secure it out the way - it wont be used again - it simply sends a signal telling the car what position the boot lock was in.
Next up we need to fit the new housing, some people have reported the need to cut out some of the metal from inside the boot to make this all fit! I can confirm that this IS NOT required. You simply need to fit the new housing without the camera fitted, this allows it to fit into the aperture in the boot. When then the new handle is in, secure it using the 4 10mm nuts - They dont need to be too tight! And then ensure the multiplug is connected to the boot release handle. I tested the operation of the boot release before I closed the boot.
Didnt want to find the boot would not open, thankfully all was well, the boot opens fine with either the remote button or the push-botton on the boot handle. Then fit the the camera into the housing and secure using the mounting plate and screw that are listed in the parts required section. You can't go wrong here because it will only fit into the housing one-way. So you cant put it in upside down!
Then we should be left with something like this:
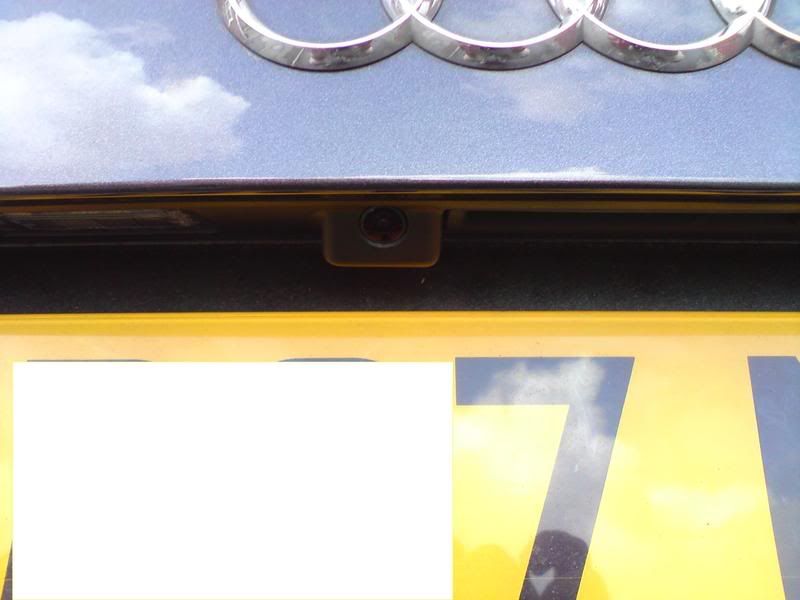
I know from the picture it looks like there could be a gap a the top of the trim but its just the angle of the camera. The number plate light trim is an exact match from the one that was removed. No cutting, trimming or bodging to fit was required. Now connect the long extension wire from kufatec to the OEM camera, there is one 'FAKRA' type plug and another 2 pin plug for power/earth. These are plug and play, again no bodging required!
Next up is the fiddly bit. Feeding the Kufatec wire through the rubber grommet that connects the boot and the body. As we already have the innner side boot trim removed you should be able to see where the wires come through into the car. Feed the wires throug the boot, down into the bottom left hand corner where the boot is fitted.

I managed to feed a stiff piece of wire through the boot first and then using very strong tape I attahced the Kufatec wire to this and pulled it through. I used a few drops of washing up liquid to help ease the wire through the rubber as it can be quite a tight fit. Just take your time and pull the wire through SLOWLY to prevent it falling off or potentialy damaging anything if your were to slip or make a mistake.